
Progress bar for Django using Celery and Redis
eeintech Django June 5, 2020 (Updated on Dec. 12, 2022)
If you are in a scenario where you need to build a Django web application which requires:
- to run a potentially long process asynchronously (eg. prevent the process from hogging all your server resources)
- to efficiently run the process (eg. prevent the process from multiple read/write to your database)
- to keep the user aware of the status and progress (eg. connect the process output to your frontend).
Think of: data parser tool, data processing tool, file format conversion tool, file download/upload tool, etc. All those tools and processes can take a while to run. One possible implementation is queueing up all the process calls so that they run one after the other and adding a visual progress bar connected to each call.
In this guide, I'll talk about one way you can get this done which I've used to build this demo application.
But first, let's talk about the requirements. Here are a few things you need to know before you get started:
- This demo is based on the Django framework: the guide assumes you know how to create and run a Django project.
- This demo uses a Redis server to act as a message broker which is used for tasks to communicate.
- This demo uses Celery for queueing and running tasks.
- Celery-Progress Django application: a Javascript and Python module to connect the task's progress to your front-end.
We'll first start by installing and running the Redis server, move on to setting up Celery in your virtual environment and Django project, and finally connect Celery to your web application front-end using the Celery-Progress module.
This guide is quite long as I've tried to make it as comprehensive as possible. Feel free to jump ahead, clone/fork my github demo and tinker with it.
Below is the table of contents, I hope you enjoy this guide!
Step 1: Understand, install and run Redis
Installing Redis is extremely easy so feel free to jump ahead to the installation part. However, you may wonder: what is Redis and what do I need it for?
Redis Lab describes it as follow:
Redis is an open source, in-memory data structure store, and each of its data structures is optimized for specific operations. Thanks to these data structures, Redis is able to support a wide range of use cases, enabling customers to use Redis as a database, cache or message broker depending on their needs.
What does it mean concretely? Redis is very versatile.
It can be set up as a database which structure is different than the more traditional SQL databases. While it can store permanent data it really shines at storing temporary data. Temporary because it is stored in memory only for a limited time, the time necessary for the information stored to be used before being deleted. For instance, it is great for displaying a dynamic user view, enabling a quick-access storage layer between your permanent database and your web application (effectively used as cache). Furthermore, Redis enables a communication channel (in other words: message broker) between live processes or tasks, which is the main function we'll use in this demo.
There are a bunch of alternatives to Redis: Memcached and RabbitMQ being the ones I've heard of. Memcached is exclusively a cache, and RabbitMQ a message broker. I've decided to use Redis because it is very popular, appears to be robust and well documented and I also use it as a cache for my own Nextcloud instance. If you are not keen on Redis or can't use it for any reason, Celery supports many different message brokers.
Alright, it is time to get Redis server up and running!
1/ Download, extract and build Redis with:
$ wget https://download.redis.io/redis-stable.tar.gz
$ tar xzvf redis-stable.tar.gz
$ cd redis-stable
$ make
$ make install
Note that if you are building Redis on a shared hosting server, instead of the make commands above, you'll need to run the following commands:
$ PREFIX=$HOME/.local make
$ PREFIX=$HOME/.local make install
And add redis to your .bashrc file:
$ echo "alias redis-server=$HOME/.local/bin/redis-server" >> ~/.bashrc
$ source ~/.bashrc2/ Create a configuration file named 6379.conf (or give it your own name) with the following content:
port              6379
daemonize         yes
save              60 1
bind              127.0.0.1
tcp-keepalive     300
dir               /home/username/my-path/my-folder
dbfilename        dump.rdb
rdbcompression    yes
pidfile           redis.pid
loglevel          notice
logfile "redis.log"- port: your computer or server port used by Redis (6379 is the default)
- daemonize: use this option if you'd like to run Redis server in the background, remove this line otherwise
- bind: address the Redis server is bound to
- dir: your local or server folder to store Redis dump.rdb, redis.log and redis.pid files
- dbfilename: file name for the Redis database
- pidfile: file to store the Redis server process ID
- logfile: file to store Redis server logs
The recommended location for this configuration file is /etc/redis/6379.conf. Regardless of where you decide to store it, you can start the Redis server with (replace /path/to/conf with your own path):
$ redis-server /path/to/conf/6379.confTake a peek at Redis log file to check if the server is running fine, you should see a similar output:
$ head -20 /home/username/my-path/my-folder/redis.log
# oO0OoO0OoO0Oo Redis is starting oO0OoO0OoO0Oo
# Redis version=7.0.5, bits=64, commit=00000000, modified=0, pid=423101, just started
# Configuration loaded
[...]
* Running mode=standalone, port=6379.
# Server initialized
* Ready to accept connections3/ The last thing to do is to install the Redis Python connector, you can add it using pip. Make sure to enable your Python virtual environment and run:
(python3-env) $ pip install redisAnd that's it! Redis is ready to be used as a message broker.
Step 2: Install Celery and Celery-Progress
Now that your message broker is up and running, you are only missing Celery to create and queue tasks, using a Celery "worker" (simply the name for a Celery server instance). I won't spend as much time to describe why is Celery needed, instead I will recommend you this excellent article (Flask is another web framework, similar to Django). Given you already know a bit about Redis, the addition of Celery should make sense to you after you've read it.
To install Celery, activate your virtual environment, and run:
(python3-env) $ pip install celeryTo install the Celery-Progress module, run:
(python3-env) $ pip install celery-progressStep 3: Connect Celery to your Django web application
To integrate Celery into your Django project, you'll need to:
- Link the Celery application to your Django project and load it when your server is started.
- Add Django settings for the Celery application.
- Create a Celery task that you can call from anywhere in your project.
1/ Let's start by linking the Celery application to your Django project.
If you haven't already, create a new Django project and apply migrations:
(python3-env) $ django-admin startproject celery_progress_demo
(python3-env) $ cd celery_progress_demo/
(python3-env) $ ./manage.py migrate
Your project structure should look like this:
celery_progress_demo/
├── celery_progress_demo
│   ├── asgi.py
│   ├── __init__.py
│   ├── settings.py
│   ├── urls.py
│   └── wsgi.py
├── db.sqlite3
└── manage.py
Create a file named celery.py in the celery_progress_demo folder and add the following code:
# Django settings
import os
from django.conf import settings
# Celery app
from celery import Celery

# Set the default Django settings module for the 'celery' program.
os.environ.setdefault('DJANGO_SETTINGS_MODULE', 'celery_progress_demo.settings')

app = Celery('celery_progress_demo', broker='redis://localhost')

# namespace='CELERY' means all celery-related configuration keys
# should have a `CELERY_` prefix.
app.config_from_object('django.conf:settings', namespace='CELERY')

# Load task modules from all registered Django app configs.
app.autodiscover_tasks()
The os.environ.setdefault sets the environment based on the Django project settings (which we'll update in the next step). The app = Celery(...) creates a Celery application inside your Django project, we give it the celery_progress_demo name and link it to the message broker (Redis). The app.config_from_object line checks for Celery settings stored in the Django settings, the name of the Celery settings should start with CELERY as it is the name given to the namespace. Finally, the app.autodiscover_tasks() will search and register tasks found in your Django project.
In the same folder, edit the __init__.py file and add:
# This will make sure the app is always imported when
# Django starts so that shared_task will use this app.
from .celery import app as celery_app

__all__ = ('celery_app',)
As mentioned in the comment, those two lines ensure that the Celery application is loaded when Django's server is started.
2/ Now add the following lines to the Django settings.py file:
...
INSTALLED_APPS = [
	...

	# Celery apps
	'celery',
	'celery_progress',
	# Download app
	'download',
]

... (end of file)

# Celery Settings
BROKER_URL = 'redis://localhost:6379'
CELERY_RESULT_BACKEND = 'redis://localhost:6379'
Inside INSTALLED_APPS we're adding the two applications (Celery and Celery-Progress) we installed in Step 2. In addition, we're calling the download app we'll create in the next step.
At the end of the file, we're adding the two Celery settings:
- BROKER_URL: name, address, and port of message broker (Redis)
- CELERY_RESULT_BACKEND: backend used to store results (same as the message broker in our case)
Those are the minimum settings necessary to run Celery in your Django project. Check out the complete list of Celery settings.
3/ It's time to create a Celery task! To do so, let's add an application (we'll name it download) to the Django project:
(python3-env) $ django-admin startapp downloadYour project tree should now look as follow:
celery_progress_demo/
├── celery_progress_demo
│   ├── asgi.py
│   ├── celery.py
│   ├── __init__.py
│   ├── settings.py
│   ├── urls.py
│   └── wsgi.py
├── db.sqlite3
├── download
│   ├── admin.py
│   ├── apps.py
│   ├── __init__.py
│   ├── migrations
│   │   └── __init__.py
│   ├── models.py
│   ├── tests.py
│   └── views.py
└── manage.py
In the new download folder, add a file named tasks.py. This file will contain the Celery task.
Edit the tasks.py file and add the following code:
# Celery
from celery import shared_task
# Celery-progress
from celery_progress.backend import ProgressRecorder
# Task imports
import time

# Celery Task
@shared_task(bind=True)
def ProcessDownload(self):
	print('Task started')
	# Create the progress recorder instance
	# which we'll use to update the web page
	progress_recorder = ProgressRecorder(self)

	print('Start')
	for i in range(5):
		# Sleep for 1 second
		time.sleep(1)
		# Print progress in Celery task output
		print(i + 1)
		# Update progress on the web page
		progress_recorder.set_progress(i + 1, 5, description="Downloading")
	print('End')

	return 'Task Complete'
A Celery task decorator @shared_task can be attached to any function. Here we created simple function called ProcessDownload which simply runs a 5 seconds counter and updates the task progress every second. The progress is updated using the progress_recorder, an instance of ProgressRecorder imported from Celery-Progress. The function of the ProgressRecorder is to update the Celery task state and data so you don't have to manually do it.
Note that all the print statements will be printed in the Celery task output, not in the Django server output.
The task returns the Task Complete string. Of course, we can return much more useful information when the task is complete but for now, let's keep it simple.
Now that we have the task ready, let's take a look at the next step: calling it from a Django view and tying its progress to the web interface (front-end).
Step 4: Call the task and update front-end using Celery-Progress
This step is where the Celery-Progress application really comes into play. It is developed and maintained by Cory Zue.
He wrote this comprehensive article detailing the interaction between the front-end/web interface and the backend (eg. the combination of Django, Celery and Redis) which allows the progress of a task to be visually accessible by the user.
The Celery-Progress application leverages his experience to simplify this process for newcomers (like me). We've already installed it in Step 2 so not let's figure out how to use it.
1/ The first thing to do is create a Django view which will call the task. In the download folder, edit views.py and add the following code:
from django.shortcuts import render
# Celery Task
from .tasks import ProcessDownload

def demo_view(request):
	# If method is POST, process form data and start task
	if request.method == 'POST':
		# Create Task
		download_task = ProcessDownload.delay()
		# Get ID
		task_id = download_task.task_id
		# Print Task ID
		print(f'Celery Task ID: {task_id}')
		# Return demo view with Task ID
		return render(request, 'progress.html', {'task_id': task_id})
	else:
		# Return demo view
		return render(request, 'progress.html', {})
What this view does:
- Import the task ProcessDownload from the tasks.py file.
- When demo_view is called, check if the request contains the POST method and if it does:
- Run the task asynchronously using the .delay() function and return the task instance into download_task.
- We extract the task ID using .task_id, the task ID will be used by the template to call the Celery-Progress view and update the progress.
- We return task_id in the context to retrieve it in the template.
- If the method is not POST, return the original view.
We need to specify which URL pattern will call this view. Create the urls.py file in the download folder and add the following code:
from django.urls import path
# Demo view
from .views import demo_view

app_name = 'download'

urlpatterns = [
	# Demo view
	path('', demo_view, name='demo'),
]
We need to link this path to the Django main router in the celery_progress_demo/urls.py file. Edit it and add the following code:
from django.contrib import admin
from django.urls import path, include

from download import urls as download_urls

urlpatterns = [
	path('admin/', admin.site.urls),
	# Demo app
	path('', include(download_urls)),
	# Celery progress
	path('celery-progress/', include('celery_progress.urls')),
]
As you noticed, we also needed to add the URL path to the Celery-Progress application, it's now done :)
2/ Alright, now we're ready to add the templates!
Create a folder named templates at the root of the project and add 3 files: base.html, download.html and progress.html.
The new project file tree should look like below:
celery_progress_demo
├── celery_progress_demo
│   ...
├── db.sqlite3
├── download
│   ...
│   ├── tasks.py
│   ├── tests.py
│   ├── urls.py
│   └── views.py
├── manage.py
└── templates
    ├── base.html
    ├── download.html
    └── progress.html
In the base.html template file, add the following code:
{% load static %}
<!DOCTYPE html>
<html lang="en">
	<head>
		<meta charset="utf-8" />
		<title>Celery Progress Demo</title>
		<meta name="Celery Progress Demo" content="" />
		<meta name="viewport" content="width=device-width, initial-scale=1" />
		<!-- Bootstrap CSS -->
		<link href="https://stackpath.bootstrapcdn.com/bootstrap/4.5.0/css/bootstrap.min.css" rel="stylesheet">
	</head>

	<body>
		{% block demo %}{% endblock %}
		<!-- JQuery -->
		<script src="https://code.jquery.com/jquery-3.5.1.min.js" integrity="sha256-9/aliU8dGd2tb6OSsuzixeV4y/faTqgFtohetphbbj0=" crossorigin="anonymous"></script>
		<!-- Bootstrap JS -->
		<script src="https://stackpath.bootstrapcdn.com/bootstrap/4.5.0/js/bootstrap.min.js"></script>
		<!-- Celery Progress -->
		<script src="{% static 'celery_progress/celery_progress.js' %}"></script>

		{% block progress_bar_js %}{% endblock progress_bar_js %}
	</body>
</html>
Nothing fancy here, just building the HTML skeleton. For this demo, we'll use the well-known Bootstrap framework to make it "pretty". And for the Javascript part, I believe Celery-Progress can run with any framework but for this demo we'll use JQuery. We add the {% block demo %} and the {% block progress_bar_js %} block tags to respectively load the demo application and Celery-Progress function calls.
Then, in download.html let's add the following HTML code:
{% extends "base.html" %}
{% load static %}

{% block demo %}
<!-- Reset Form -->
<a href="{% url 'download:demo' %}" role="button" class="btn btn-primary btn-lg btn-block" style="border-radius: 0px;"><b>RESET</b></a>

<!-- Download Form -->
<div class="container text-center" style="padding-top: 20px;">
	<form action="{% url 'download:demo' %}" method="post" style="display: inline;">
		{% csrf_token %}
		<button class="btn btn-primary" type="submit" style="width:120px;">
			<strong>Download</strong>
		</button>
	</form>
</div>

<!-- Download Status -->
<div class="container" style="padding-top: 20px;">
	<div class="card" style="height: 120px;">
		{% block progress %}{% endblock progress %}
	</div>
</div>
{% endblock %}
Here we build the demo block, which consists of 3 different sections:
- a reset button to restore the original view (eg. erase progress bar)
- a download "form" which is for now just a Download button (we'll update it to a true form in the last section)
- and the progress bar section, which we'll define inside the {% block progress %} block.
Finally, in progress.html add:
{% extends "download.html" %}
{% load static %}
{% block progress %}
<div class="text-center" style="font-size: 14px">
<div id="progress-bar-message">
Click the "Download" button
</div>
</div>
<div class='progress-wrapper' style="padding-top: 10px;">
<div id='progress-bar' class='progress-bar progress-bar-striped' role='progressbar' style="height:30px; width: 0%; border-radius: 5px"> </div>
</div>
<div id="celery-result">
</div>
{% endblock progress %}
{% block progress_bar_js %}
{% if task_id %}
<script type="text/javascript">
// Progress Bar (JQuery)
$(function () {
var progressUrl = "{% url 'celery_progress:task_status' task_id %}";
CeleryProgressBar.initProgressBar(progressUrl, {})
});
</script>
{% endif %}
{% endblock progress_bar_js %}This is where things get interesting!
The first div displays the current progress "description" which is fed and updated by the ProgressRecorder instance (in the download/tasks.py file).
The second div is where the action happens and where the progress bar is animated.
The third div is used to display the result of the task (which can be constructed depending on the task return value).
Right after the {% block progress %} block, we're building the {% block progress_bar_js %} which we declared back in the base.html file.
The {% if task_id %} is there so that the progress bar Javascript function is only loaded when the Django demo_view returns it (when someone clicks on the Download button).
The function calls the task_status view from Celery-Progress, passing the task ID as a parameter, which takes care of updating the 3 previous div section.
One last tiny step is to add the templates folder to the list of templates directories in the Django settings. Edit the celery_progress_demo/settings.py file and add:
TEMPLATES = [
	{
	...
		'DIRS': [
			os.path.join(BASE_DIR, 'templates'),
		],
	...
    },
]
And that's it, you've successfully implemented a progress bar using Celery in your Django project! It's time to give it a shot.
Step 5: Run the demo
1/ Make sure the Redis instance started in Step 1 is still running. One simple way is to check if its process is still alive:
$ ps cax | grep redis
1000 ? Ssl 3:14 redis-server2/ Make sure you are still in the Django project folder and start a new Celery worker with this command:
$ celery -A celery_progress_demo worker --loglevel=infoIf it connects to the Redis server, you should see this kind of output:
-------------- celery@local v5.2.7 (dawn-chorus)
--- ***** -----
-- ******* ---- local-os-info 2022-12-12 22:22:22
- *** --- * ---
- ** ---------- [config]
- ** ---------- .> app:         celery_progress_demo
- ** ---------- .> transport:   redis://localhost:6379//
- ** ---------- .> results:     redis://localhost:6379/
- *** --- * --- .> concurrency: 4 (prefork)
-- ******* ---- .> task events: OFF (enable -E to monitor tasks in this worker)
--- ***** -----
 -------------- [queues]
                .> celery           exchange=celery(direct) key=celery

[tasks]
  . download.tasks.ProcessDownload

[INFO/MainProcess] Connected to redis://localhost:6379//
...
[INFO/MainProcess] celery@local ready.
You can see that:
- the Celery worker found the task we created (download.tasks.ProcessDownload)
- it connected to the Redis server (Connected to redis://localhost:6379//)
- it is ready to serve tasks (celery@local ready).
3/ Finally, start the Django server:
(python3-env) $ ./manage.py runserverIn your browser, navigate to http://localhost:8000/, you should now see this web page:

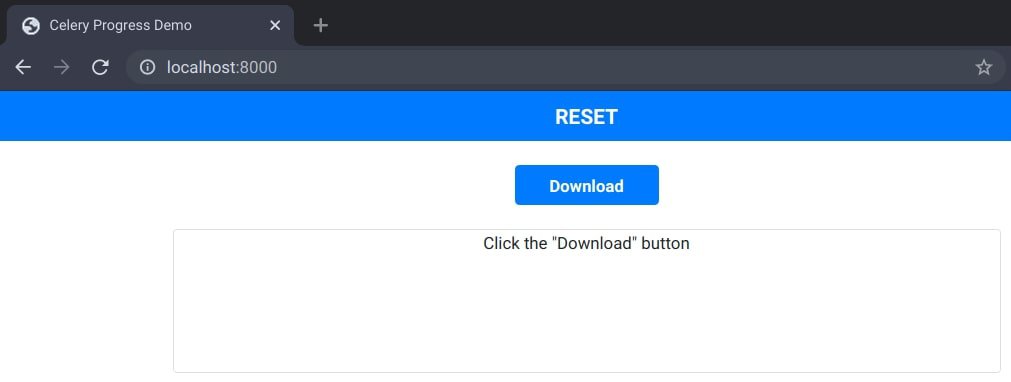
Click the "Download" Button and await for the progress bar to become complete, yay!
You can take a look at the Celery command output, you should see this:
[INFO/MainProcess] Received task: download.tasks.ProcessDownload[TASK_ID]
[WARNING/ForkPoolWorker-1] Task started
[WARNING/ForkPoolWorker-1] Start
[WARNING/ForkPoolWorker-1] 1
[WARNING/ForkPoolWorker-1] 2
[WARNING/ForkPoolWorker-1] 3
[WARNING/ForkPoolWorker-1] 4
[WARNING/ForkPoolWorker-1] 5
[WARNING/ForkPoolWorker-1] End
[INFO/ForkPoolWorker-1] Task download.tasks.ProcessDownload[TASK_ID] succeeded in 5.Xs: 'Task Complete'
The output tells us that:
- the Celery worker received the task and added it to the queue
- each "WARNING" message is related to the print calls in the task function (in tasks.py)
- the Celery worker informs us when the task is complete and returns the 'Task Complete' message
- TASK_ID is a sequence of letters and numbers separated by dashes, this is in fact the ID which is passed to the progress.html template to kick-off the whole process, which we're also printing in the demo_view and that you can retrieve in the Django server output:
[timestamp] "GET /celery-progress/TASK_ID/ HTTP/1.1" 200
Celery Task ID: TASK_ID
That's all there is to know for now! Enjoy your first progress bar before moving on to the next section where we build a more "real life" application.
Step 6: Expand the task and application
In this section, we will update the previous task to download a file or web page, which is the base idea for my demo application on GitHub: the user enters a URL and wget is used to fetch and download it.
1/ Let's start by adding the URL form input. Add a forms.py file in the project download folder. Add the following code:
from django import forms

class DownloadForm(forms.Form):
	url = forms.CharField(max_length = 255, widget=forms.TextInput({
				'class':'form-control',
				'placeholder':'Enter URL to download...',
			}))
As the DownloadForm only needs one field (CharField), we'll combine it together with the download button using an input group from Bootstrap. Here we're passing a TextInput widget defining the class and the placeholder message so that the CharField input gets automatically formatted in the template.
2/ Let's now update the Celery task to download the URL. Still in the download folder, edit the tasks.py file. Update the imports and ProcessDownload task with:
# Task imports
import os, time, subprocess, re

@shared_task(bind=True)
def ProcessDownload(self, url):
	# Announce new task (celery worker output)
	print('Download: Task started')

	# Saved downloaded file with this name
	filename = 'file_download'
	# Wget command (5 seconds timeout)
	command = f'wget {url} -T 5 -O {filename}'

	# Start download process
	download = subprocess.Popen(command.split(' '), stdout=subprocess.PIPE, stderr=subprocess.STDOUT)
	# Read each output line and update progress
	update_progress(self, download)

	# Make sure wget process is terminated
	download.terminate()
	try:
		# Wait 100ms
		download.wait(timeout=0.1)
		# Print return code (celery worker output)
		print(f'Subprocess terminated [Code {download.returncode}]')
	except subprocess.TimeoutExpired:
		# Process was not terminated in the timeout period
		print('Subprocess did not terminate on time')

	# Check if process was successfully completed (return code = 0)
	if download.returncode == 0:
		# Delete file
		try:
			folder = os.getcwd()
			filepath = os.path.join(folder, filename)
			os.remove(filepath)
		except:
			print('Could not delete file')
		# Return message to update task result
		return 'Download was successful!'
	else:
		# Raise exception to indicate something wrong with task
		raise Exception('Download timed out, try again')
The comments in the code pretty much explain it all, in summary:
- the wget command is ran using Python's subprocess library (the 5s timeout was added to trigger a task failure in case the download hangs for too long)
- we are continuously checking on the output of the process to update the progress bar (see update_progress function below)
- we terminate the process and check if it completed successfully (in that case we delete the downloaded file) or not
- we return a message corresponding to the result of the task.
To continuously check on progress of the wget process and update the front-end, add the update_progress function and code below:
def update_progress(self, proc):
	# Create progress recorder instance
	progress_recorder = ProgressRecorder(self)

	while True:
		# Read wget process output line-by-line
		line = proc.stdout.readline()

		# If line is empty: break loop (wget process completed)
		if line == b'':
			break

		linestr = line.decode('utf-8')
		if '%' in linestr:
			# Find percentage value using regex
			percentage = re.findall('[0-9]{0,3}%', linestr)[0].replace('%','')
			# Print percentage value (celery worker output)
			print(percentage)
			# Build description
			progress_description = 'Downloading (' + str(percentage) + '%)'
			# Update progress recorder
			progress_recorder.set_progress(int(percentage), 100, description=progress_description)
		else:
			# Print line
			print(linestr)

		# Sleep for 100ms
		time.sleep(0.1)
It is simply looking for the percentage value returned by the wget process using regex. If or when the percentage value is returned, we call the set_progress function of the ProgressRecorder instance (remember that it handles the update of the progress bar). We kill the while loop once the process output is empty (eg. process is complete).
3/ Now we need to tie the new form and task together so let's update the demo_view to retrieve the URL entered by the user and pass it to the task. Edit the views.py file (located in the download folder) with the following code:
def demo_view(request):
	# If method is POST, process form data and start task
	if request.method == 'POST':
		# Get form instance
		form = DownloadForm(request.POST)

		if form.is_valid():
			# Retrieve URL from form data
			url = form.cleaned_data['url']

			print(f'Downloading: {url}')
			# Create Task
			download_task = ProcessDownload.delay(url)
			# Get ID
			task_id = download_task.task_id
			# Print Task ID
			print (f'Celery Task ID: {task_id}')

			# Return demo view with Task ID
			return render(request, 'progress.html', {'form': form, 'task_id': task_id})
		else:
			# Return demo view
			return render(request, 'progress.html', {'form': form})
	else:
		# Get form instance
		form = DownloadForm()
		# Return demo view
		return render(request, 'progress.html', {'form': form})
The flow is pretty straightforward:
- For POST requests, retrieve the form information then
- if valid: extract the URL and call the task passing it as an argument, return the task ID to trigger the progress bar.
- if not valid: do not return the task ID and show the form errors in the template (see next step).
- For any other request: return a blank form.
4/ Finally, onto the templates. Edit download.html in the templates folder and replace the <form> section with:
<form action="{% url 'download:demo' %}" method="post" style="display: inline;">
	{% csrf_token %}
	<div class="form-group">
		<div class="input-group mb-3" align="center" style="margin:0 auto;">
		  {{ form.url }}
		  <div class="input-group-append">
			<button class="btn btn-primary" type="submit" style="width:120px;">
				<strong>Download</strong>
			</button>
		  </div>
		</div>
	</div>
	{{ form.errors }}
</form>
Slightly more complex than just the button, right? Actually not so much:
- we add the {% csrf_token %} tag to certify the form request was originated from this website
- we create an input group to bundle the form.url TextInput widget and the "Download" button
- we display the form.errors, if any.
Now update the progress.html template first <div> tag, which contains the initial progress bar message (eg. user form instructions):
<div class="text-center" style="font-size: 14px">
	<div id="progress-bar-message">
	Enter URL and click the "Download" button
	</div>
</div>
We're going to use some of the Celery-Progress functions to customize the messaging when the task is running and to show the result. Replace the Javascript (<script>) section with:
<script type="text/javascript">
	function processProgress(progressBarElement, progressBarMessageElement, progress) {
			progressBarElement.style.width = progress.percent + "%";
			var description = progress.description || "Starting download";
			progressBarMessageElement.innerHTML = description;
		}

	function processResult(resultElement, result) {
		if (result.includes("successful")) {
			$( resultElement ).append(
				$('<br>')
			);
			$( resultElement ).append(
				$('<p class="text-center">').text(result)
			);
		}
	}

	// Progress Bar (JQuery)
	$(function () {
		var progressUrl = "{% url 'celery_progress:task_status' task_id %}";
		CeleryProgressBar.initProgressBar(progressUrl, {
			onProgress: processProgress,
			onResult: processResult,
		})
	});
</script>
Here you can see 2 new functions were added: processProgress and processResult. Those are only a few of the many custom functions you can add to your progress bar, for that check out the Celery-Progress customization section. We're using the processProgress function to display "Starting download" during the initialization of the wget process (else it would show the default message), the rest of the function is similar to the default Celery-Progress function: update the progress bar width and description based on the inputs from the ProgressRecorder instance (called in the task function). In the processResult function, we're doing nothing more than adding HTML code to the <div id="celery-result"> tag when the task is complete. The result variable contains the string returned by the task (eg. 'Download was successful!'). Finally, we link the 2 custom functions to the CeleryProgressBar bar instance.
And that's it, time to try it out! Run the Redis server, Celery worker, and Django server (like in Step 5) then navigate to http://localhost:8000/, you should now see the new form in action!